Our pick Ooni Koda 16
Check price on AmazonHow to Use a Pizza Stone (2026): Preheat, Launch, Bake, and Clean It Right
A pizza stone turns a home oven into something close to a pizzeria, but only if you use it the way owners have learned to: cold oven in, an hour of preheat, a floured peel, a confident launch, and never, ever soap. Here is the whole method, the mistakes that crack stones, and how to care for one so it lasts a decade.
We earn a commission on purchases through our links, at no cost to you. It never decides a ranking. How this works

Quick answer
- Always start the stone in a cold oven and preheat 45-60 minutes at the highest setting. Putting a cold stone in a hot oven is the number-one way to crack it.
- Lower-middle rack is the consensus position: close to the bottom element for base heat, far enough to avoid scorching.
- Build the pizza on a peel dusted with semolina or flour and launch with one confident pull. Parchment under the pizza is the beginner's safety net and works fine.
- Bake 8-10 minutes at 450°F or 6-8 at 500°F, rotate halfway, pull when the underside is browned and the cheese bubbles.
- Cleaning: cool completely, scrape, wipe with a dry or barely damp cloth. No soap, no soaking, no dishwasher. Stains are normal and permanent.
Short version: put the stone in a cold oven on the lower-middle rack, set the oven as high as it goes, and wait 45 to 60 minutes. Build your pizza on a peel dusted with flour or semolina, slide it onto the stone with a quick pull, bake 8 to 10 minutes at 450°F or 6 to 8 at 500°F, rotate once, and pull it when the underside is browned. Let the stone cool completely in the oven, scrape it clean with a bench scraper or spatula, and never wash it with soap or soak it in water. Do those things and a stone is the best value upgrade a home pizza baker can make.
Why a stone works: a home oven's air tops out around 500°F, nowhere near a real pizza oven, but a stone stores heat and dumps it into the base of the pizza on contact, which is what crisps the crust and drives the oven spring that gives a puffy edge. It is the same physics as a pizzeria's deck. The catch, and the source of nearly every complaint about stones, is that the slab takes far longer to heat than the air around it, so the method lives or dies on the preheat.
Our guidance is the consensus of the home-baking community, cross-checked across the sources we track; we are a research and verification desk, not a test kitchen. Stones vary in thickness and material, cordierite versus ceramic versus clay, and the thicker and denser the stone, the longer it takes to heat and the better it bakes once it gets there.
What you'll need
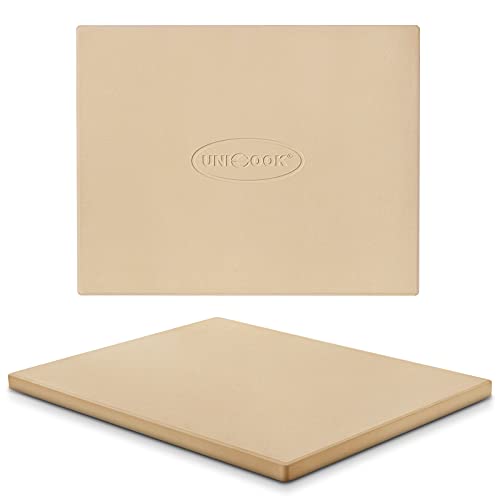
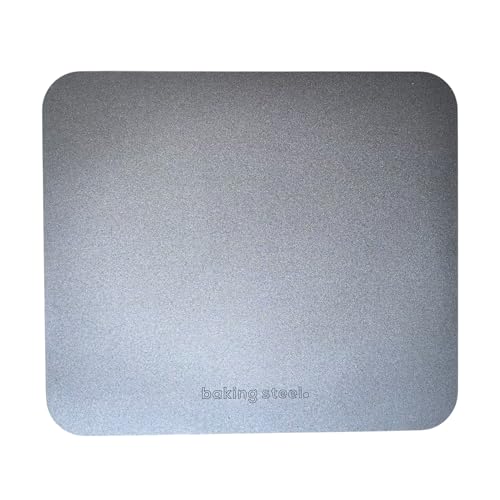
The five tools that do the work in every method on this site: a slab that stores heat, something to launch with, a way to read the surface, and a clean cut.


In this guide
Step one: where it goes and how long it preheats
Put the stone on the lower-middle rack of a cold oven, then turn the oven to its highest setting, 500°F or 550°F on most, 450°F at minimum. The cold start matters because stones, especially ceramic and clay ones, crack from thermal shock when one side heats much faster than the other; warming up with the oven keeps the slab even. Then wait. The oven's thermostat reads the air, which is ready in 15 minutes, but the stone is a thick slab that needs 45 minutes to an hour to saturate with heat all the way through. Launch a pizza onto a half-heated stone and it pulls heat out of the dough instead of pushing it in, and the base comes out paler than a plain tray would have made it.
Two ways to know the stone is ready. The reliable one is an infrared thermometer aimed at the surface: at a 500°F setting, you want the stone reading roughly 475-500°F; at 450°F, about 430-450°F. The other is patience, the full hour, every time. A baking steel saturates faster, 30-45 minutes, because steel conducts heat through itself; if preheat time is your bottleneck, our stone vs. steel comparison explains the trade-off.
Step two: building on the peel and the launch
The pizza is assembled on a peel, not on the stone; you cannot top a pizza on a 500°F slab inside an oven. Dust the peel generously with semolina, cornmeal, or flour, stretch the dough onto it, and work quickly: the longer a topped pizza sits on the peel, the more the dough absorbs the dusting and sticks. Before topping, give the peel a small shake to confirm the dough slides. Then top lightly; a wet, overloaded pizza is both harder to launch and slower to bake. Sauce to within an inch of the edge, cheese in a single layer, toppings sparingly.
The launch: open the oven, rest the front edge of the peel at the back of the stone, tilt slightly, and pull the peel back toward you in one confident motion while the pizza slides off. Hesitation is what causes folds and spills; commit to the pull. If the dough sticks, a quick jiggle and a puff of flour under the stuck edge usually frees it. The beginner's safety net: build the pizza on a sheet of parchment and launch paper and all; the base crisps slightly less, but it never sticks, and you can slide the paper out after 2 minutes once the crust has set. A peel set with a wooden launch peel and a small metal turning peel is the standard kit; wood for building (dough sticks to it less), metal for turning and retrieving.
Step three: baking, rotating, and the doneness cues
At 500°F, a standard thin-to-medium homemade pizza on a saturated stone takes 6-8 minutes; at 450°F, 8-10 minutes. Neapolitan-style doughs run at the fast end, thicker doughs at the slow end. Every home oven has a hot side, so rotate the pizza 180 degrees at the halfway mark with a turning peel or a wide spatula. Our full timing chart covers every crust and temperature, and the temperature guide explains why hotter is better for most styles.
The cues that outrank the clock: the underside is browned with some char spotting (lift an edge with the peel to check), the edge is golden and blistered, and the cheese is bubbling with browned patches. If the top lags the bottom, move the stone up a rack next time or finish 60-90 seconds under the broiler, the home-oven version of a pizza oven's dome heat. Between pizzas, give the stone 5-10 minutes to recover; each launch pulls heat out of it, and the third pie in a row bakes slower than the first unless you wait. Retrieve the finished pizza with the metal peel, rest it 2 minutes on a rack or board, and cut it with a wheel cutter rather than a knife that drags the cheese.
Cleaning a pizza stone: scrape, wipe, never soap
Let the stone cool completely inside the oven, which takes a couple of hours; moving a hot stone risks cracking it and burning you. Then scrape off any stuck cheese or char with a bench scraper, a metal spatula, or a stiff brush. Wipe with a dry cloth, or one that is barely damp. That is the whole routine. Stones are porous, which is precisely why they bake well, and it is why they absorb anything you put on them: soap soaks in and comes back out as flavor in your next pizza, and water soaked into the stone turns to steam in the next preheat and can crack it. No dishwasher, ever.
Stains are normal. A stone darkens with use, unevenly, and owners consider a well-blackened stone a badge of honor; it bakes exactly as well as a new one. For a stubborn burnt patch, a paste of baking soda and a little water scrubbed with a brush, then wiped and fully air-dried for a day before the next use, is the community's accepted deep clean. For an oven that runs a self-clean cycle, take the stone out first; the 900°F cycle is more than many stones tolerate. Stored in the oven is fine (many owners leave it in permanently, which also evens out the oven's heat for everything else you bake), just remember it is there before a cold-start roast.
The mistakes that crack stones and ruin pizzas
Cold stone into a hot oven. Thermal shock, the leading cause of cracked stones. Cold oven, always. Frozen pizza onto a screaming-hot ceramic stone. Same shock in reverse; cordierite stones like the Unicook are built to take it, thin ceramic ones are not. Oil on the stone. It does not season a stone like cast iron; it soaks in, smokes, and goes rancid. Dry stone, always. Soap and soaking. Covered above, and the complaint that generates the most regret. Skipping the preheat. The source of most "my stone makes worse pizza than a tray" reviews; it needs the hour.
Overloading the pizza. A wet, heavy pie sticks to the peel, bakes slowly, and steams its own base. Top lightly. Launching onto a dusty stone. Flour and semolina that fell off previous launches burns and tastes bitter; brush the stone off between pizzas with a dry brush. Using it on a grill or open flame without checking. Many stones are fine on a covered gas grill and a few are not; direct flame cracks most of them. If you want pizza on the grill, our grill pizza oven guide covers purpose-built options, and our stones and steels rankings pick the slabs worth buying.
How to use a pizza stone
- 1
Cold oven, lower-middle rack
Place the stone on the lower-middle rack of a cold oven. Never put a cold stone into a hot oven.
- 2
Preheat 45-60 minutes
Set the oven to its highest setting (450°F minimum) and wait 45-60 minutes for the stone itself to saturate, not just the air. An infrared thermometer confirms the surface temperature.
- 3
Build on a dusted peel
Dust a peel with semolina or flour, stretch the dough onto it, shake to confirm it slides, and top lightly. Or build on parchment as a no-stick safety net.
- 4
Launch and bake
Rest the peel at the back of the stone and pull it away in one confident motion. Bake 6-8 minutes at 500°F or 8-10 at 450°F, rotating 180 degrees halfway.
- 5
Cool, scrape, wipe
Let the stone cool fully in the oven. Scrape off debris, wipe with a dry cloth. No soap, no soaking, no dishwasher.
Ready to buy? Start with our top picks
Whatever this guide steered you toward, here's where most readers land. Live price check on each.
- Check price on Amazon

- Check price on Amazon

- Check price on Amazon

- Check price on Amazon

- Check price on Amazon

- Check price on Amazon

As an Amazon Associate we earn from qualifying purchases, at no cost to you.
Key terms
- Thermal shock
- The stress a stone suffers when one part heats or cools much faster than another. The cause of most cracks: cold stone in a hot oven, frozen pizza on a hot stone, water on a hot stone.
- Cordierite
- The ceramic mineral most good pizza stones are made from. It tolerates thermal shock far better than clay or plain ceramic, which is why it is the material our rankings favor.
- Recovery time
- The 5-10 minutes a stone needs between pizzas to reheat its surface after a launch pulled heat out of it. Steel recovers faster.
Frequently asked questions
How long do you preheat a pizza stone?
45 minutes to an hour at the oven's highest setting, starting from a cold oven. The oven's air is ready in 15 minutes, but the stone is a thick slab that needs the full hour to saturate. An infrared thermometer confirms it: at a 500°F setting the surface should read roughly 475-500°F before you launch.
Do you put a pizza stone in a cold oven or a hot oven?
Cold oven, always. Putting a cold stone into a hot oven is the most common way to crack one through thermal shock. Place it on the lower-middle rack, then turn the oven on and let the stone warm up with it.
How do you keep pizza from sticking to the stone?
Sticking usually happens on the peel, not the stone. Dust the peel generously with semolina, cornmeal, or flour, build the pizza quickly, and shake the peel to confirm the dough slides before topping. On the stone itself, a fully preheated surface sets the dough instantly so it releases; a cool stone lets it stick. Parchment under the pizza is a reliable beginner's fallback.
How do you clean a pizza stone?
Let it cool completely in the oven, scrape off stuck food with a bench scraper or spatula, and wipe with a dry or barely damp cloth. Never use soap, never soak it, and never put it in the dishwasher: the porous stone absorbs soap and water, which ruin flavor and can crack it on the next preheat. Dark stains are normal and do not affect baking.
Filed under Explainer · Part of Pizza Oven 101, Accessories & Technique
Keep reading
The Bake, free weekly
Price drops worth knowing about, technique that matters, and every new review.