Our pick. Ooni
Check price on Amazon →How to Reheat Pizza in the Oven (2026): Every Method, Ranked
Leftover pizza deserves better than the microwave, and the fix costs nothing you do not already own. This is the definitive reheat guide: the skillet-then-broiler trick that wins for a slice or two, the 275°F low-and-slow oven method that revives a whole pie without drying it out, the 450°F stone-or-steel method that gets closest to fresh, and where the air fryer honestly fits. Exact temperatures and times for each, drawn from the broad consensus of home cooks who have argued this question to death, plus the two mistakes that ruin more leftover slices than anything else.
By The Pizza Oven Review DeskUpdated 2026-07-25~10 min readRanked on verified floor heatHow we research
We earn a commission on purchases through our links, at no cost to you. It never decides a ranking. How this works

Short answer first, because you may be standing in front of the fridge right now: for one or two slices, the skillet-then-broiler method is the best way to reheat pizza, a few minutes in a covered skillet over medium heat re-crisps the base while the trapped steam revives the cheese. For half a pizza or more, use the oven at 275°F, low and slow, about 25 minutes on a foil-lined tray, which warms the slice through without turning the crust into a cracker. And if you own a pizza stone or baking steel, the 450°F method on a fully preheated surface is the ceiling: the closest a day-old slice gets to the pizza it used to be.
Why so many methods? Because reheating pizza is really two problems wearing one trench coat. The crust wants dry, conductive heat from below to re-crisp; the cheese and toppings want gentle, ambient heat from above to re-melt without rendering into grease. The microwave fails both at once, it steams the crust soggy while overheating the cheese, which is why a microwaved slice is floppy, rubbery, and somehow both wet and tough. Every good method below is just a different way of solving the two problems in the right order, and each one suits a different situation: how many slices, how much time, and what gear you own.
A note on where our numbers come from, because we are a research and verification desk, not a test kitchen: the temperatures and times in this guide are the widely-agreed consensus of the home-cooking community, the settings that thousands of owners and cooks have converged on through years of collective trial and error, cross-checked across the sources we track. Treat them as reliable starting points, not lab certifications: ovens vary, crusts vary, and the visual cues we give for doneness matter more than the clock.
The short version.
- Best overall for 1-2 slices: the skillet-then-broiler method, about 3 minutes covered in a skillet over medium heat, then 1-2 minutes under the broiler (or simply keep the lid on and skip the broiler), crisp base, melted cheese, no sog.
- Best for a whole pie or many slices: the 275°F low-and-slow oven method, roughly 25 minutes on a foil-lined tray, community consensus for warming pizza through without drying the crust out.
- Closest to fresh: the 450°F stone-or-steel method, slices go onto a surface preheated for a full 45-60 minutes and come back in about 5-7 minutes with a genuinely re-crisped base.
- The air fryer is the speed pick for 1-2 slices, about 3-4 minutes at 325-350°F, faster than the oven and crisper than the microwave, but it fits little and can dry a thin crust fast.
- The two big mistakes: the microwave (steams the crust soggy and toughens the cheese) and putting cold slices directly on the bare rack of a screaming-hot oven, which dries the slice and drips cheese onto the oven floor.
Our top-rated pizza ovens
Whatever you decide, these are the ovens we recommend, ranked on stated floor heat. Live price check on each.
- Check price on Amazon

- Check price on Amazon

- Check price on Amazon

- Check price on Amazon

- Check price on Amazon

- Check price on Amazon

As an Amazon Associate we earn from qualifying purchases, at no cost to you.
What you'll need.
Prices approximate at time of writing.
The five tools that do the work in every method on this site: a slab that stores heat, something to launch with, a way to read the surface, and a clean cut.


Why reheated pizza goes wrong: the two-problem trench coat
Understand the failure and every method below becomes obvious. A fresh pizza has a crisp, dry base and molten, elastic cheese. Overnight in the fridge, two things happen: the crust absorbs moisture and goes soft, and the cheese sets into a solid, slightly greasy layer. Reheating therefore has two jobs that want opposite conditions. The crust needs dry, conductive heat from below, direct contact with a hot surface that drives moisture out and re-crisps the base. The cheese needs gentle, ambient heat from above, enough to re-melt it without breaking it into rubber and grease pools.
The microwave fails both jobs simultaneously, which is why it is the villain of this guide. Microwaves heat by exciting water molecules, so they actively steam the crust from the inside, the exact opposite of the dry heat it needs, while the cheese races past melted into tough and rubbery. The result is the floppy, chewy, weirdly wet slice everyone recognizes. Every good method below is a different way of getting conductive heat to the bottom and gentle heat to the top, in the right order, and the method you choose mostly depends on how many slices you are reviving and what gear you own.
The skillet-then-broiler method: best for one or two slices
This is the method the home-cooking community has crowned for a slice or two, and the consensus is deserved, because a skillet solves both problems with hardware every kitchen owns. The steps: set a heavy skillet (cast iron is ideal, any decent pan works) over medium heat, no oil, and lay the cold slices in once the pan is warm. Give the base about 2-3 minutes of direct contact, which re-crisps it exactly the way a pizza stone would. Then handle the top: either cover the skillet with a lid for the final 1-2 minutes, letting trapped heat re-melt the cheese, or slide the skillet under a preheated broiler for 1-2 minutes if you want browned, bubbling cheese rather than just melted.
Two refinements the consensus has converged on. First, if you use the lid rather than the broiler, a couple of drops of water added to the far side of the pan just before covering creates a brief burst of steam that revives the cheese faster, keep it away from the crust and keep it to drops, not a splash. Second, medium heat, not high: too hot and the base scorches before the cheese moves. The whole operation takes about five minutes, no preheating an oven, and the floor-to-ceiling result, crisp base, molten top, beats every other method at this batch size.
The 275°F low-and-slow oven method: best for a whole pie
When you are reviving half a pizza or more, the skillet runs out of room and the oven takes over, and the counterintuitive consensus move is to go low. Set the oven to 275°F, line a sheet tray with foil, arrange the slices with a little space between them, and give them roughly 25 minutes, until the cheese has gone glossy and a corner of crust feels crisp when you lift it. Some cooks tent a second sheet of foil loosely over the top for the first half of the time, which slows the cheese while the base catches up; uncover for the final stretch so nothing steams.
Why low and slow beats a hot oven for this job: a cold, day-old slice needs time for heat to reach its center, and at 275°F it gets that time without the surface racing ahead. Crank the same oven to 450°F with slices on a bare tray and the edges dry to crouton territory while the middle is still cool, the classic reheat-gone-wrong. At 275°F the moisture gradient re-equalizes gently, the crust re-crisps against the tray, and the cheese re-melts without splitting into grease. It is the slowest method in this guide and the most forgiving one, which is exactly what you want when dinner for the family is riding on it.
The 450°F stone-or-steel method: the crispiest crust, closest to fresh
If you own a pizza stone or a baking steel, you own the ceiling of this entire guide. The method: put the surface on a middle rack, set the oven to 450°F, and, this is the part everyone shortcuts, give it a full 45-60 minutes to actually saturate with heat; the air reaches temperature in minutes, but the slab needs the long soak. If you would rather confirm than guess, an infrared thermometer reads the surface in a second. Then slide the cold slices directly onto the hot surface and pull them in about 5-7 minutes, when the cheese bubbles and the underside has re-browned. The preheated mass dumps dry, conductive heat into the base on contact, which is the same physics that crisped the crust the first time around, and the result is the only reheat that genuinely reads as fresh.
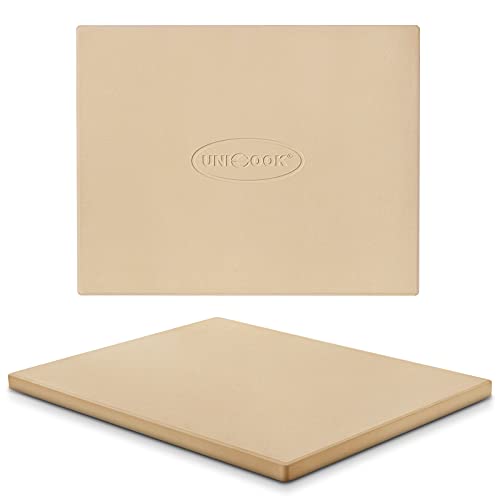
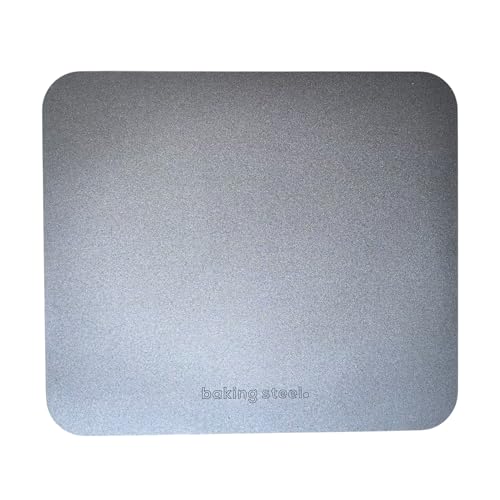
The two surfaces we point readers to are the ones that top our rankings: the Original Baking Steel, which stores and transfers heat harder than any stone and re-crisps a base fastest, and the Unicook cordierite stone, the thermal-shock-resistant value pick that is gentler on the crust and kinder to the budget. The honest trade-off of this method is time and energy, an hour of preheat to reheat two slices is a poor exchange, which is why it shines when it piggybacks: reheating leftovers while the oven is already hot for something else, or reviving a large batch where the quality gain multiplies. For the full stone-versus-steel decision, our stones and steels guide ranks the field, and pizza stone vs. steel settles the material question.
The air fryer, honestly compared
The air fryer earns its place in this guide as the speed pick, with caveats the consensus is equally clear about. The settings: 325-350°F for about 3-4 minutes, slices in a single layer, no overlap. Because an air fryer is a small convection oven with a fan very close to the food, it re-crisps a slice noticeably faster than a full oven and dramatically better than a microwave, and for one or two slices on a weeknight it is a genuinely good answer that needs no preheated slab and little patience.
The caveats: capacity and aggression. The basket fits a slice or two, so it is a solo-lunch tool, not a family one. And that same close-quarters fan that makes it fast also makes it the quickest method in this guide to overshoot, thin crusts dry out fast, loose toppings can get blown around the basket, and an extra careless minute turns a slice into a cracker. Check early, pull early. Head-to-head: the skillet still edges it on crust quality at the same batch size, the air fryer wins on hands-off convenience, and both bury the microwave. If the air fryer is the appliance you will actually use, use it, the best reheat method is the one that keeps you off the microwave button.
Every method at a glance: temps, times, and when to pick each
The consensus numbers, in one place. Skillet-then-broiler: skillet over medium heat, 2-3 minutes for the base, then lid on (or broiler) for 1-2 minutes, total about 5 minutes, best overall for 1-2 slices. Low-and-slow oven: 275°F, foil-lined tray, roughly 25 minutes, best for a whole pie or a crowd of slices, the most forgiving method here. Stone or steel: 450°F with the surface preheated a full 45-60 minutes, slices straight onto the slab for 5-7 minutes, the crispiest result and the closest to fresh, when you have the time or the oven is already hot. Air fryer: 325-350°F for 3-4 minutes, the speed pick for a solo slice, checked early so it does not dry out.
Matching method to situation is nearly automatic once you frame it as batch size versus gear versus patience. One or two slices and a stovetop: skillet. One or two slices and a countertop air fryer you love: air fryer. Family-scale leftovers: 275°F oven. Any batch size, a stone or steel in the oven, and either patience or an already-hot oven: the 450°F method, which is also the one to choose when the slice itself is special, good bakery pizza, thin crust, anything whose crisp base was the point. The only always-wrong answer is the microwave, and even that has a footnote below. Each method has its own deep dive: the air fryer, the skillet, and the microwave, damage-controlled.
The mistakes that ruin leftover pizza
Mistake one: the microwave, used alone. As covered above, microwaves heat by exciting water, so they steam the crust limp from within while shooting the cheese past melted into rubber. If the microwave is truly your only option, the community's damage-control consensus is a mug or small cup of water in beside the plate, which moderates the process somewhat, expectations firmly managed, or better, use the microwave for 20-30 seconds only to take the chill off, then finish the slice in a hot skillet for two minutes to rebuild the crust. The microwave can start the job; it should never finish it.
Mistake two: cold slices straight onto the bare rack of a very hot oven. It seems logical, maximum heat, maximum crisp, but a bare rack gives the crust nothing to re-crisp against, the direct radiant blast dries the exposed edges before the center warms, and softened cheese drips through the bars onto the oven floor. If you want high heat, that is exactly what the stone-or-steel method is for: the slab supplies the contact surface a rack cannot. The supporting cast of errors: skipping the preheat on a stone or steel (an unsaturated slab reheats like a cold tray), overcrowding, slices need space or they steam each other, and reheating a slice twice, which no method survives. Reheat what you will eat, once, and eat it hot.
How to reheat pizza in the oven (low-and-slow method)
- 1
Set the oven to 275°F
Preheat the oven to 275°F. Low and slow is the point: it warms the slice through to the center without drying the crust or splitting the cheese.
- 2
Line a tray and space the slices
Line a sheet tray with foil and arrange the cold slices with space between them so they crisp instead of steaming each other.
- 3
Optionally tent with foil
For the first half of the time, loosely tent a second sheet of foil over the slices to slow the cheese while the base catches up, then uncover so nothing steams.
- 4
Heat for about 25 minutes
Reheat for roughly 25 minutes, until the cheese is glossy and remelted and a corner of the crust feels crisp when lifted. Ovens vary, so trust the cues over the clock.
- 5
Rest for a minute and serve
Give the slices a minute out of the oven so the cheese sets from molten back to elastic, then serve. Reheat only what you will eat; no slice survives a second revival.
Ready to buy? Start with our top picks
Whatever this guide steered you toward, here's where most readers land, ranked on stated floor heat. Live price check on each.
- Check price on Amazon
- Check price on Amazon
- Check price on Amazon
- Check price on Amazon
- Check price on Amazon
- Check price on Amazon
As an Amazon Associate we earn from qualifying purchases, at no cost to you.
Key terms
- Conductive (contact) heat
- Heat delivered by direct contact with a hot surface, a skillet, a stone, a steel. It is what re-crisps a pizza base, and it is the ingredient the microwave and the bare oven rack both fail to supply.
- Low and slow (275°F)
- The gentle-oven reheat: 275°F for about 25 minutes on a foil-lined tray. Slow enough for heat to reach the center of a cold slice before the edges dry out, which is why it is the consensus method for batches.
- Preheat saturation
- The full 45-60 minutes a stone or steel needs at temperature before it can do its job. The oven's air heats in minutes, but the slab must soak up heat mass-deep, or it reheats like a cold tray.
- Carryover melt
- The minute after reheating when residual heat finishes the job and molten cheese sets back to elastic. Resting a slice briefly out of the oven is the difference between stretchy cheese and a scalded mouth.
- Owner and community consensus
- Where this guide's numbers come from: the settings thousands of home cooks have converged on through collective trial and error, cross-checked across the sources we track, rather than a single lab's claim. Reliable starting points; your oven has the final vote.
Questions, answered
What temperature should I reheat pizza in the oven?
Two consensus answers for two situations. For a batch of slices or a whole pie on a tray, 275°F, low and slow, warms everything through without drying the crust; expect about 25 minutes. If you own a pizza stone or baking steel, 450°F with the surface fully preheated is the quality ceiling: the hot slab re-crisps the base on contact and slices come back in 5-7 minutes. What you should not do is split the difference by putting bare slices in a very hot oven on a rack or thin tray, high heat without a heat-storing surface dries the slice out before the center warms.
How long does it take to reheat pizza in the oven?
At 275°F on a foil-lined tray, roughly 25 minutes, until the cheese is glossy and a lifted corner of crust feels crisp. On a stone or steel at 450°F, about 5-7 minutes, but only after the surface itself has preheated for a full 45-60 minutes, the slab, not the air, does the work. For comparison, the skillet method takes about 5 minutes total on the stovetop and the air fryer 3-4 minutes at 325-350°F. In every method, visual cues outrank the clock: bubbling cheese and a re-browned underside mean done, regardless of what the timer says.
How do I reheat pizza without drying it out?
Go low, cover early, and give the base something to sit on. The 275°F method is the most forgiving: the gentle temperature lets heat reach the center before the edges dry, and loosely tenting foil over the slices for the first half of the time protects the cheese, uncover for the final stretch so nothing steams. On the stovetop, the covered skillet does the same job, the lid traps just enough moisture for the cheese while the pan keeps the base dry and crisping. What dries pizza out is high ambient heat with no contact surface, so avoid bare racks, keep slices from overlapping, and pull them as soon as the cheese re-melts.
Should I reheat frozen pizza the same way?
No, a never-baked frozen pizza is a different job: it is not being revived, it is being cooked, so follow its box, typically a 425-450°F oven for 12-15 minutes, and a preheated stone or steel makes the box instructions noticeably better by crisping the base. If what you have is leftover slices of an already-baked pizza that you froze, treat them like fridge leftovers with a head start: thaw in the fridge if you can, then use any method in this guide, or go straight from frozen to the 275°F oven and add roughly 5-10 minutes, checking the center is hot before the edges overshoot.
Is the oven or the air fryer better for reheating pizza?
Different jobs. The air fryer wins on speed and convenience for one or two slices, 3-4 minutes at 325-350°F with no meaningful preheat, and its close-quarters fan re-crisps far better than a microwave. The oven wins on capacity and control: 275°F handles a whole pie evenly, and a stone or steel at 450°F beats everything on crust quality. The air fryer's weaknesses are capacity, a slice or two per basket, and aggression, thin crusts dry out fast, so check at 3 minutes. For a solo lunch, use the air fryer or the skillet; for family-scale leftovers or best-possible results, use the oven.
Why is microwaved pizza so bad?
Because a microwave heats by exciting water molecules, which is precisely backwards for pizza. The moisture inside the crust turns to steam and softens it from within, so the base goes floppy instead of crisp, while the cheese overshoots melted and tightens into rubber, a slice that is somehow soggy and tough at once. If the microwave is unavoidable, use it for 20-30 seconds just to take the chill off, then finish in a hot skillet for two minutes to rebuild the crust, or park a mug of water beside the plate for modest damage control. As a finishing method, though, the community consensus is unanimous: it is the one tool in the kitchen that cannot do this job.
Keep reading.
How to Reheat Deep Dish Pizza (2026)
Thick slices need 350°F, a foil tent, and a probe at 165°F in the center. The method, ranked.
How to Keep Pizza Warm (2026)
Before it goes cold: the low-oven rack hold, the box question, and pizza-night timing.
Best Pizza Stones and Steels (2026)
The ranked surfaces behind the 450°F method, the steel and stone that turn a home oven into a reheat machine.
Pizza Stone vs. Steel
The material decision in full: heat transfer, char, weight, and price, and which surface suits your oven.
What Temperature for Pizza?
The temperature bands that define pizza baking, from home-oven ceilings to 950°F Neapolitan floors.
Pizza Oven vs. Regular Oven
What a dedicated oven changes, and why the same physics decide how well your leftovers revive.